How do I create a MyQuest® account?
Use the following steps to create a MyQuest® account:
1 Go to MyQuest.QuestDiagnostics.com and then click Create a MyQuest account.
2 On the Tell us about you page, complete all required fields and then click Next.
|
Note: Your personal information is used to verify your identity and match you to your results. |
3 On the Communication preferences page, select the check boxes next to Email and/or Text to indicate your notification preference, and then click Next.
4 On the Review your information page, check your information and preferences to verify they're correct.
|
Note: If you need to make a change, click |
5 Click Create account.
6 Check the email account that you signed up with and open the Verification code for your Quest Diagnostics account email (from [email protected]).
If you don't see it, it might be in your spam folder.
7 On the Activate account page, enter the 6 digit code from your email in the Verification code box and click Continue.
|
Note: If your code expired, click Resend code to get another email and code. |
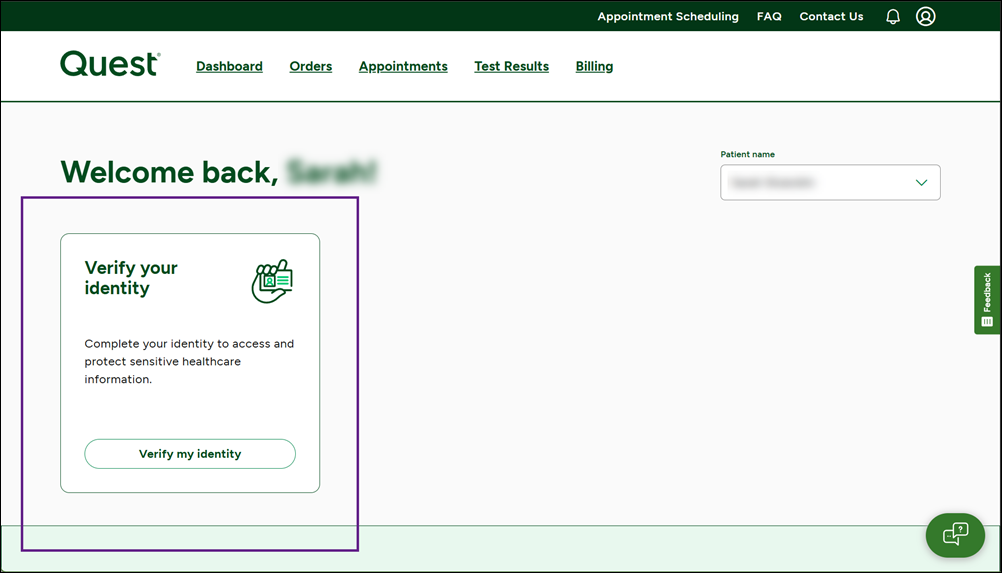
8 In your MyQuest account, click the Verify your identity box to start the verification process.
|
Note: You won't be able to view your results in MyQuest until your identity is verified. |
9 Follow the onscreen instructions.
10 When the Identity Verification Successful! message appears, click Return to MyQuest.
Congratulations! You have successfully created a MyQuest account and verified your identity. If you had lab tests done at Quest Diagnostics® within the last year, those results will show in MyQuest within 24 hours. For any new tests, check the In progress section of the Test Results tab to see the estimated delivery date(s) for your results.
|
Note: The estimated delivery date may change. If it does, you'll see a We're experiencing a process delay message at the bottom of the delayed test in the In progress section of the Test Results tab, with additional information on getting your results. |